Authoring Lesson Modules
You can write your own lessons for your team and serve them from a public GitHub repository, with no app rebuild. This page covers the repository layout, the manifest schema, the two lesson kinds, and how to publish.
If you only want to use the built-in demo lessons, you do not need any of this; see How Lessons Work.
Worked examples
Two real examples to read alongside this page:
- A complete standalone lessons repo: github.com/mathewdunne/coderunner-lessons, the maintainer's own team lessons, structured exactly as described here.
- The bundled demo catalog:
catalog/in the CodeRunner repo, the two demo modules baked into the app.
Repository layout
A lessons repository has a manifest at its root and one directory per module:
modules.json              ← the catalog manifest (required, at repo root)
modules/
  hello-world/             ← one directory per module
    README.md             ← the lesson text
    .vscode/              ← editor config (run config, Java settings)
    src/...               ← the starting source files
  robot-starter/
    README.md
    .vscode/
    build.gradle
    src/...
    ...
Each modules/<id>/ directory is a complete starting project: everything
the student needs the moment the lesson loads. There is no separate build or
packaging step; CodeRunner copies the directory contents directly into the
student's workspace.
The modules/ folder name is a convention used by these examples, not a
requirement. The manifest's subdir field (below) is what actually points at
each module's directory, so you can lay the repo out however you like as long as
subdir matches.
The modules.json manifest
modules.json lists every module in the catalog. Here is the real bundled
manifest, which is a complete and valid example:
{
  "schemaVersion": 1,
  "modules": [
    {
      "id": "hello-world",
      "title": "Hello, World",
      "description": "Variables, terminal input, and printing values.",
      "subdir": "modules/hello-world",
      "kind": "plain-java",
      "order": 10
    },
    {
      "id": "robot-starter",
      "title": "Robot Starter",
      "description": "A minimal WPILib command-based robot you run from the Driver Station.",
      "subdir": "modules/robot-starter",
      "kind": "robot",
      "order": 20
    }
  ]
}
Top-level fields
| Field | Type | Notes |
|---|---|---|
schemaVersion | integer | Manifest format version. Use 1. |
modules | array | One entry per lesson module. |
Module fields
Every field is required.
| Field | Type | Notes |
|---|---|---|
id | string | Stable, unique identifier. Used internally and recorded as the student's current module. Don't reuse or rename casually. |
title | string | Shown in the Switch Project menu. |
description | string | One-line summary shown under the title. May be empty. |
subdir | string | Relative path from the repo root to the module directory (for example modules/hello-world). Must be a relative path of safe segments: no leading slash and no ... |
kind | string | Either plain-java or robot. See below. |
order | integer | Sort position in the menu (ascending). |
Sparse ordering
order is just a sort key, so leave gaps. Numbering modules 10, 20, 30
instead of 1, 2, 3 lets you insert a new lesson between two existing ones
later (say 15) without renumbering everything else.
The two lesson kinds
The kind field controls how the student runs the lesson and what the UI shows.
plain-java
A bare Java project with no Gradle or WPILib, just .java source files. The
student runs it from the editor's Run button, and the robot simulation UI is
hidden because there is no robot. Use this for programming fundamentals:
variables, loops, classes, terminal I/O.
A plain-java module needs a .vscode/launch.json with a run configuration so
the editor knows what to launch. The bundled hello-world module uses this:
{
  "version": "0.2.0",
  "configurations": [
    {
      "type": "java",
      "name": "Run Main",
      "request": "launch",
      "mainClass": "Main",
      "cwd": "${workspaceFolder}",
      "console": "integratedTerminal"
    }
  ]
}
Point mainClass at the class with your main method.
robot
A full WPILib/Gradle robot project, the same structure WPILib's project
generator produces (build.gradle, gradlew, vendordeps/, .wpilib/,
src/main/java/frc/robot/...). The student clicks Start in the Driver
Station, which builds the project and starts it in simulation. Once it is
ready, they choose a mode and click Enable. The full Driver Station and
AdvantageScope/PathPlanner tool pane are available. Use this for robot programming.
To seed PathPlanner content, include its normal deploy tree under
src/main/deploy/pathplanner/. Those files are copied with the rest of the
module and are editable from either PathPlanner or VSCodium.
You do not need to do anything special to make a robot project run headless in
the container. CodeRunner applies a non-destructive Gradle override at run time
that strips the desktop simulation GUI and enables the WebSocket server the web
Driver Station needs. The student still sees their original build.gradle
unchanged in the editor. (This means projects that call addGui() /
addDriverstation() work without edits, which is useful to know if you base a
robot module on an existing team project.)
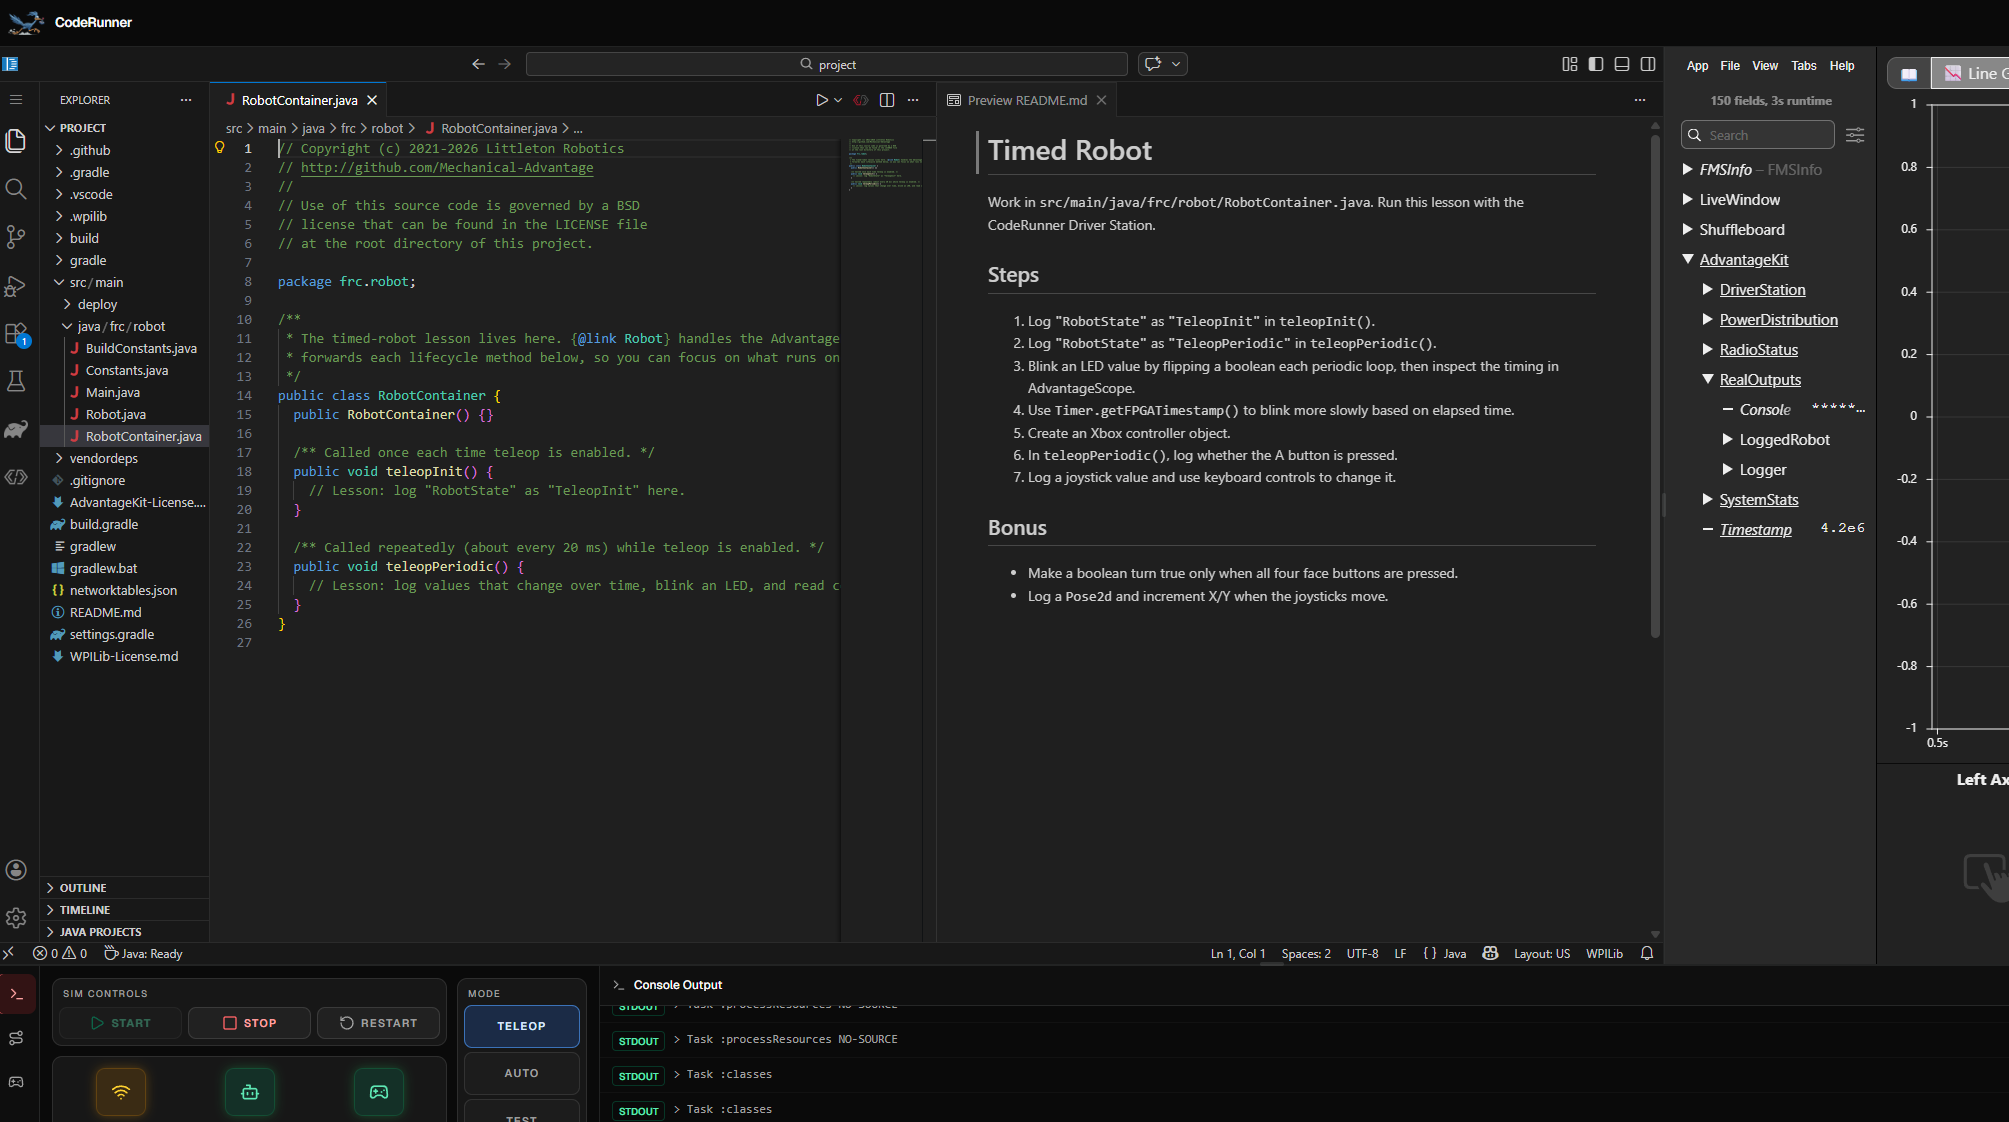
The README is the lesson text
Each module's README.md is the lesson. When a student loads a module,
the README appears at the workspace root. Write it as the student-facing
walkthrough: goal, steps, and optional bonus challenges.
Students open README.md from the Explorer sidebar, so use a clear filename and
make the document useful from its first heading. For example, the bundled
hello-world README begins with the goal, lists numbered steps, and finishes
with bonus challenges.
The .vscode/ folder
The module's .vscode/ folder ships editor configuration into the workspace:
- For
plain-java, alaunch.jsonrun configuration (above) plus asettings.jsonthat tells the Java extension how to treat the project (for example markingsrcas the source path and disabling Gradle import). - For
robot, editor settings appropriate to a Gradle/WPILib project.
Including a sensible .vscode/ is what makes a lesson "just work" when it loads,
instead of the student having to configure the editor themselves.
Publishing
- Put your repo on a public GitHub repository with
modules.jsonat the root. - On the control plane, set
LESSONS_CATALOG_REPOtoowner/repo(or the fullhttps://github.com/owner/repoURL), and optionallyLESSONS_CATALOG_BRANCHif you are not usingmain. See Configuration. - Push your changes. CodeRunner caches the module list for 60 seconds, so edits go live within about a minute with no app rebuild or redeploy.
When a remote catalog is configured, students never see the bundled demo modules; your repo's modules fully replace them.
Example curriculum
A natural progression is to start with plain-Java fundamentals and build toward a working WPILib robot. One worked sequence:
- Hello, World (
plain-java): variables, terminal input, printing. - Number guessing game (
plain-java): loops, conditionals, input validation. - Perimeter / area (
plain-java): methods and arithmetic, then again class-based to introduce objects. - First robot run (
robot): a starter robot you run from the Driver Station, logging values and a moving pose so students see telemetry. - Timed and command-based robots (
robot):teleopPeriodic, subsystems, commands bound to controller buttons, an autonomous chooser. - Controllers and templates (
robot): PID control and a kitbot-style drivetrain template.
The early plain-java lessons teach Java with fast edit-and-run feedback; the
later robot lessons move into real FRC code running in simulation. Mix and
order them to suit your team using the order field.